7 Tips for Choosing a Micro Injection Mold?

Choosing a Micro Injection Mold is a precision decision, not merely a tooling purchase. A mold that looks excellent on paper may still produce flash, short shots, or damaged ribs. These failures often appear after production begins, when corrections become expensive. The right choice connects part geometry, resin behavior, machine capability, and expected volume.

John Bozzelli, an experienced injection molding consultant, has said, “The mold is the heart of the molding process.” His observation remains practical for micro molding. At this scale, a vent measuring fractions of a millimeter can influence filling stability. A gate placed too far from a thin wall may create hesitation. Steel selection also matters, especially when abrasive engineering polymers require repeated cycles. Experienced teams inspect these details before requesting a final quotation.

Small details matter.

This guide presents seven practical tips for choosing a Micro Injection Mold. It examines dimensional tolerances, mold materials, gate design, venting, cooling, maintenance access, and supplier capability. Each factor deserves evidence, not attractive promises. Ask to review sample parts, inspection reports, tool-flow analysis, and previous micro-molding projects. A supplier should explain how it controls cavity alignment and measures features under production conditions.

Still, no checklist is perfect. Some recommendations may need adjustment for medical components, optical parts, or unusual resins. My own review process has sometimes focused too heavily on initial mold cost. That approach missed downtime, cleaning effort, and qualification risks. A reliable decision considers the complete manufacturing life of the tool. These seven tips offer a clearer starting point, while leaving room for testing and careful reconsideration.
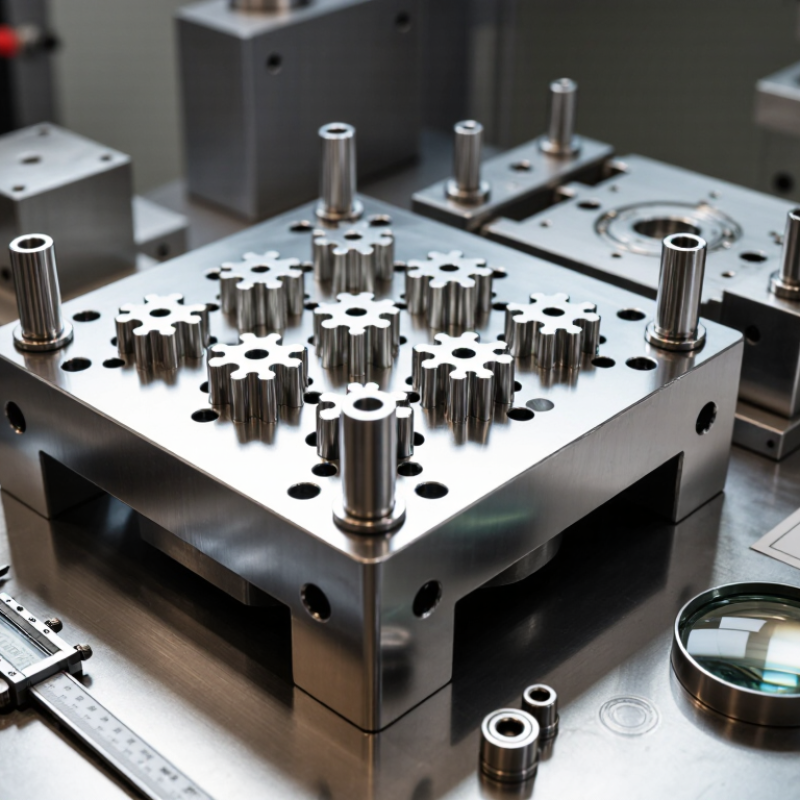
7 Tips for Choosing a Micro Injection Mold?

Define the Product’s Micro-Scale Requirements

7 Tips for Choosing a Micro Injection Mold

Define the Product’s Micro-Scale Requirements

Before choosing a micro injection mold, define every critical feature in measurable terms. Record the smallest rib, hole, wall, and textured area. Do not rely on phrases like “very small.” They create confusion during mold design and inspection.

A 0.25 mm wall may require a different steel layout than a 0.6 mm wall. Specify dimensional tolerances, draft angles, aspect ratios, and allowable flash. Also document the resin, expected shrinkage, flow length, and operating temperature. These details influence gate size, vent depth, cooling channels, and ejection force.

Measure the product as it will be used.

In practice, I compare the CAD model with molded samples under magnification. A feature that looks acceptable on screen may collapse after cooling. Tiny holes can also become partially blocked by trapped air or material variation. That risk is easy to underestimate.

Define how measurements will be taken. Optical inspection, high-magnification imaging, and coordinate measurement may produce different results. Use the same method for design approval and production checks. Include a sample plan for early trials, because one perfect part proves very little.

Small errors become expensive.

Leave room for adjustment. Micro molds often need changes to venting, gate balance, or polish after the first trial. A rigid design may save time initially, but it can make later corrections difficult. Specification work should be precise, yet practical.

Evaluate Mold Materials and Precision Standards

Choosing a micro injection mold starts with its material, not its appearance. Match the steel or alloy to the resin, cycle count, and expected pressure. Hardened tool steel suits long production runs and abrasive materials. Stainless steel helps resist corrosion from moisture-sensitive or chemically active resins. For tiny cavities, uniform hardness matters because small wear can change a feature by only a few microns.

Precision standards need practical definitions. Ask for cavity tolerances, insert alignment, parting-line control, and surface-finish values. A tolerance statement without measurement methods is incomplete. Optical inspection can check micro features, while a coordinate measuring machine verifies critical dimensions. Request inspection records from trial shots, not only machining reports. Compare measurements at room temperature because thermal expansion can affect narrow dimensions.

Venting deserves attention. Trapped air may leave burn marks or short shots around thin walls. Gate location also affects filling balance and warpage. Use replaceable inserts when a fragile feature may wear quickly. Confirm the mold can hold its target accuracy after repeated heating and cooling. Small details matter.

In practice, teams sometimes over-specify steel and under-specify inspection. That is an expensive imbalance. A highly polished cavity will not fix poor alignment. I would also question any supplier promising universal micron-level accuracy without resin, geometry, and process conditions. Even experienced engineers miss hidden shrinkage near ribs. Leave room for trial adjustments, because the first mold review is rarely perfect.

Check Machine Compatibility and Injection Parameters

Tip 1: Check the machine’s minimum shot size. A micro mold needs stable dosing, not excessive barrel capacity.
Tip 2: Compare the mold’s projected area with available clamp force. Too little force may create flash around tiny cavities. Too much force can hide alignment problems.
Tip 3: Confirm nozzle, sprue, and locating-ring dimensions before ordering. A small mismatch can stop installation completely.
Tip 4: Match the screw diameter to the required shot volume. Oversized screws often reduce dosing accuracy and material consistency.
Tip 5: Review injection speed and pressure ranges. Micro parts may need fast filling, but excessive speed can cause burns, jetting, or damaged details.
Tip 6: Set melt and mold temperatures from tested material data. Do not rely only on general processing charts; small cavities cool quickly.
Tip 7: Check the controller’s repeatability. A tiny variation in pressure or cushion can change a thin wall by several microns.

I once underestimated residence time in a large barrel. The material looked acceptable, yet molded parts showed unstable color and weight. That experience changed my selection process. I now calculate shot percentage, expected cycle time, and injection volume before choosing a micro injection mold.

I also request machine drawings and conduct a short trial with actual resin. This is not always convenient. It prevents expensive assumptions, though.

Vent depth, gate location, and ejection timing deserve equal attention. A mold may fit physically but still perform poorly when machine settings lack fine control.

Compare Tooling Costs, Lifespan, and Maintenance Needs

7 Tips for Choosing a Micro Injection Mold

A low tooling quote can hide higher production costs. Ask for a complete cost breakdown, including design changes, testing, surface treatment, and spare components. Compare the price per expected shot, not only the purchase price. A simple mold may cost less initially, but poor alignment can create flash and increase scrap. Request sample parts before approving final production. Small defects become expensive at high volumes.

Check the mold steel, cavity design, and expected service life. Hardened steel usually supports more cycles, while softer materials may suit short runs or prototypes. Confirm the supplier’s cycle estimate and define how it was calculated.

Tip three: inspect tolerance control. Micro parts often need stable dimensions across thousands of shots. Tip four: ask about replaceable inserts. They can reduce future repair costs. Tip five: examine cooling access, because uneven cooling may extend cycle times and cause warpage. These details affect both lifespan and output.

Maintenance needs deserve equal attention. Ask how often the mold requires cleaning, lubrication, vent inspection, and dimensional checks. Clear maintenance instructions should include torque values, inspection points, and recommended storage conditions.

Tip seven: verify repair support and spare-part availability before signing. A mold sitting idle for weeks can cost more than a higher-quality tool. I have seen cost comparisons focus too narrowly on the first invoice. That approach needs reconsideration. A reliable decision weighs purchase price, downtime risk, maintenance labor, part quality, and the mold’s realistic service life.

Verify Manufacturer Expertise and Quality Control

When choosing a micro injection mold supplier, verify experience beyond a polished website. Ask how many miniature molds they have completed and for which material types. Practical experience matters because tiny gates, vents, and ejector pins leave little room for correction. Ask for evidence.

Request sample inspection reports, not only product photos. A reliable manufacturer should measure critical dimensions with calibrated equipment, such as a coordinate measuring machine or optical system. Their report should show tolerances, actual readings, and inspection dates. Check whether the same standards apply during trial runs and mass production.

Quality control must continue after the mold leaves the workshop. Ask about steel certification, cavity polishing, cooling-channel checks, and preventive maintenance records. A capable team should also explain how it handles flash, short shots, and uneven filling. These defects can appear after temperature changes or repeated cycles. Small errors multiply.

I would also observe the factory floor if possible. Are gauges labeled? Are molds protected from dust and impact? Do technicians record adjustments clearly? These details reveal working habits. Still, audits are not perfect. A clean visit cannot guarantee every future batch. Request a written sampling plan, acceptance criteria, and corrective-action process before signing. A manufacturer that answers specific questions calmly is usually more dependable than one offering vague promises.

+1 450 449 9133
Contact us sale@rhythmachine.com